- Keep it ventilated: open the windows on opposite corners of the studio and put in an exhaust fan, you can also use an air purifier to keep the air circulating all the time.
- Organize and compartmentalize: Use tall cabinets to seal off lead paints for extra safety.
- Safety: Put the lid on the brush washing can when you are finished using it, and seal the waste cloth after wetting it with water to prevent any danger.
- Lighting: Use 5000 K diffused light to avoid color deviation.
- Choose the right supplies for your oil painting journey
- If you are just starting to learn oil painting, you can prepare a Starter Kit, which contains 7 colors of oil paint, a black paint, a large tube of white paint, 2 rows of brushes, a palette knife, OMS, linseed oil, a small glass palette, and 10 sheets of oil painting paper. For about $500 – $600 you can start your oil painting journey.
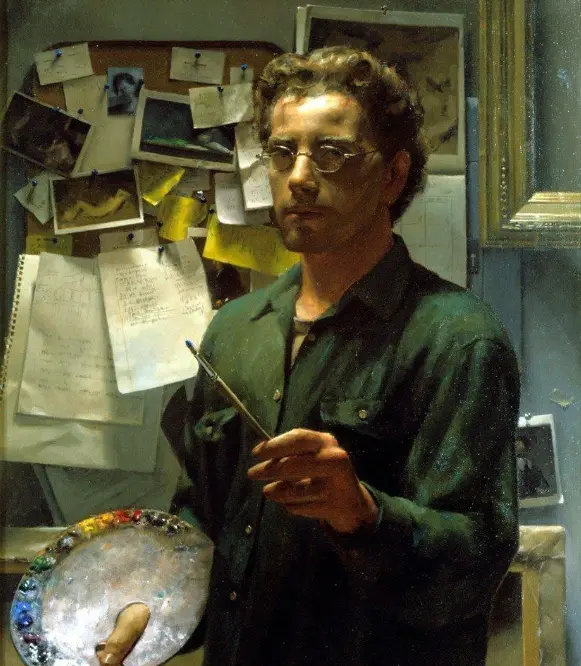
Is oil painting really difficult, oil painting seems to be “experts can play things”, acrylic is like a special preparation for novices. But in fact, as long as we understand the characteristics of the oil painting materials, master the correct techniques, you will find that oil painting is not only not difficult, in some aspects than acrylic painting is better than painting it. From several aspects, to give us a good talk about the benefits of oil painting for beginners, entry skills, solutions to common problems, and then give you a practical list and practice methods.
Why choose oil paints over acrylics?
Benefits of Oil Paints for Beginners
A good number of instructors of oil painting classes will tell new students, “Painting is not something that only geniuses can do, you can enjoy painting if you choose the right materials for painting.” Oil paints dry slowly, which is a big plus. When we paint on the canvas, we can put on the color first, wipe it off when we feel it’s not good, and then re-paint and re-correct it, without worrying about the paint drying up all at once. For us beginners, this feature of being able to make changes over and over again will make us slowly change the idea that “oil painting is difficult” and feel that “oil painting is actually easier to control”. Moreover, the unique luster and depth of oil painting can make the painting become texture at once. Many newcomers, when they see their first oil painting assignment, will feel confident when they see that their painting has that advanced feeling, and think, “I can do it well too”.
Artistic Flexibility of Oil Painting as a Medium
Oil painting is made up of pigments, oils and media. If we add refined linseed oil or walnut oil to the paint, we can make it as thick as cream or as thin as silk, and we can mix it any way we want. Acrylic can be applied thickly, but it doesn’t have the optical depth of a transparent overdye that an oil painting has. Watercolor, because of its granular and colloidal structure, is difficult to paint with a highly saturated, thick overlay effect. There are many kinds of materials for painting, but oil painting can be applied thickly, thinly, wiped, scraped, and is particularly flexible.
Comparing the drying times of oil and acrylic
Acrylic dries particularly fast, within five minutes of painting, which is especially good for painting commercial illustrations or street graffiti. However, if we want to carefully adjust the transition of the edge of the clouds, the slow-drying traditional oil paint is a good helper. With the addition of Alkyd, we can be both efficient and modifiable. Nowadays, there are also quick-drying, modified and even water-mixed oil paints on the market, so “whether to choose oil or acrylic” is no longer a problem, and we can mix them according to our own needs.
Essential Oil Painting Techniques for Beginners
Understanding the oil painting process
The complete oil painting process can be divided into five layers:
- Priming: Use an acrylic primer or oil-based primer to seal the fibers of the canvas so that later layers of paint will adhere better to the canvas.
- Monochrome starting: thinned ochre or ultramarine pigments are used to define the light and darkness of the picture. The pigments are very thin at this stage and the solvent should be 70%.
- Laying down large blocks of color: Just like stacking bricks, put the approximate color field first, without rushing to carve out details.
- Deep Stacking: Follow the principle of “Fat – over – Lean”, that is, the further back you paint, the amount of oil should gradually increase, so as to shape the three-dimensional effect and the material of the object.
- Overdye + Varnish: After the painting is completely dry, adjust the light and shadow effects with transparent colors, and finally seal the image with Dammar or synthetic varnish.
This process may seem a bit complicated, but it allows us to take full advantage of the slow drying of oil paintings, and slowly correct any mistakes in the painting.
How to dilute paint with linseed oil
Linseed oil is the most commonly used oil for mixing, it holds the color of the paint well and is affordable. When you are starting out, it is recommended to use a ratio of 3:1 (pigment: oil), with a 5% drop of unflavored mineral oil to make the pigment flow better. If you are particularly sensitive to odor, you can use walnut oil instead of linseed oil. Walnut oil dries more slowly and yellows less, making it especially good for fine overdyes. There is a motto for oil mixing: “The bottom layer is thin, the top layer is fat”, if you don’t follow this, the picture may crack because the bottom layer doesn’t absorb enough oil.
Painting with Brush Technique
- Wet painting: Mixing colors on the same layer of paint that has not yet dried, this method is suitable for painting clouds, skin, and other things with soft edges.
- Dry Brushing Scumbling: Using a stiff bristle brush dipped in a very small amount of paint and swept gently across the picture can leave a translucent gauzy effect.
- Scraping and Building: Use a palette knife to scrape off paint that is too thick, or to build up bumps 1mm thick at a time; this is especially good when painting petal highlights.
- Sweeping: Use a broad brush to sweep a large area of sky horizontally, so as to avoid leaving brush marks.
After mastering these techniques, our images will not just be monotonous flat paintings, but will become rich and three-dimensional.
Is Oil Painting Difficult? Tips to Make Oil Painting Easier
Overcoming the Oil Painting Learning Curve
When many people first start learning oil painting, they feel like there is so much to learn, like paints, mediums, solvents, rules to prevent drying out, and so on. In fact, let’s break these down into daily practice in just three steps:
- Monochrome Sphere Exercise: Understand where light comes from and what’s going on with shades of color by painting a monochrome sphere.
- Five-color still life: When drawing still life, practice the contrast between warm and cool colors, and develop our intuition to match colors.
- Small landscapes: Painting small landscapes allows us to learn how to handle perspective and spatial hierarchy in the picture.
Once we are familiar with this process, we will find oil painting not so difficult.
Effective cleaning and maintenance of tools
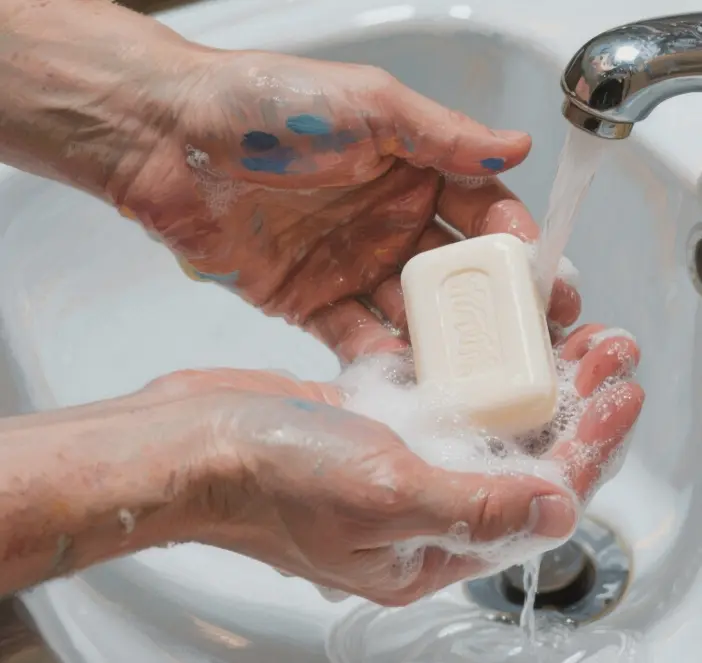
Cleaning the brushes is as simple as wiping the paint off with a paper towel, shaking them in the OMS, and washing them with soap and water. If you are using a water-oil system, just rinse with tap water. Some people worry that the oil paint will clog the brushes, in fact, as long as we wash the brushes immediately after painting, even if they are ordinary brushes used by students, they can be used for two or three years.
Enhance your oil paintings with mediums
- Quick Drying Alkyd: If we are short on time or want to layer thicker paintings, Quick Drying Alkyd is perfect.
- Light Wax Paste: Light Wax Paste gives a three-dimensional texture and reduces the reflection of highlights.
- Standing oil: Standing oil has a strong sense of pull and is often used when painting classical portraits.
Even if we are using student-grade paints, with these mediums, the result will not be worse than high-end paints.
Choosing oil or acrylic paints for your next art class
Advantages of traditional oil paints
In a comprehensive art class, the teacher would have the students try oil paint, acrylics and other mediums. It turns out that oil paint is particularly intuitive because it dries slowly and the teacher can teach us to paint while correcting our mistakes. Although acrylic dries quickly, it requires a high degree of control over color shades and is not the friendliest choice for novices. Teachers will often say, “Trust oil painting once, and you’ll realize you can paint better.”
Explore water-soluble oil paints as an option
If we are particularly concerned about the smell of solvents, consider using water-soluble oil paints. These paints can be diluted with water and cleaned up with soap and water, and they maintain the sheen of oil paint while being low VOC, making them especially good for those who paint on a desk in their bedroom.
Understanding the differences in painting mediums
| Indicator | Traditional oils | Acrylic | Water-soluble oils |
| Surface drying | 12 – 24 hrs | 5 – 15 mins | 3 – 6 hrs |
| Corrections | Very Easy | Medium | Easy |
| Gloss | Medium – High | Matte | Medium – High |
| Methods | Medium | Simple | Simple |
So, although oil painting requires patience, if we plan well, it will bring us the highest return.
How to successfully start painting with oils
Laying out the perfect workspace
Developing Portrait Creativity with Oil
We can start by painting the structure of the skull in a single shade of brown, then build on that gray scale with a thin layer of flesh color, and then brighten up the lips and ear tips with a saturated red. After painting a portrait, we can paint a small landscape oil painting, a change of subject matter painting, can let us more quickly improve the ability to match the color and the use of brushstrokes.
All in all, many people feel that “oil painting is difficult”, in fact, it is more of a psychological problem. The name of the material sounds a bit scary, and the slow drying time will make us anxious. But as long as we understand the system of oil paint, know the difference between oil and acrylic, learn to utilize the rhythm of drying and wetting, and use the right medium, we will find that oil painting is actually much friendlier than we thought. Let’s remember that oil painting requires patience, good planning, and a little curiosity. Once we have mastered this, we will be able to experience the freedom and fulfillment of painting with layer upon layer of color. Families, let’s pick up our brushes and enter the wonderful world of oil painting!